Mostrar mensagens com a etiqueta how to. Mostrar todas as mensagens

quinta-feira, 1 de maio de 2014

How to Prepare for an Important Meeting?!

Hi Party People!

Today it looks like Winter came and knocked at my door! I want the Sun so bad again...

This year I've been having probably the most important meetings of my life. And it's been one after the other. So I had to quickly adapt to a "meeting" mode. 

I learned a few things that I think are important to consider. 

A) Confidence is the most important element when you go to a meeting. Prepare everything that you need so you can reduce the chance of having any doubts. For me it's super important.

B) Prepare your makeup, hair and total outfit the night before the meeting. Have on your desk all your makeup products and hair products. And in your chair, the outfit. Specially if you have an early meeting. For your makeup and hair try to wear something that you feel represents your personality. But also something that you can adapt quickly, like neutral colors. 

C) Also don't forget to plan all your travels the day before. And go at least 30min before the time you are supposed to leave your house. You never know what can happen and those 30min extra can really save your meeting.

D) If you don't have a car and have to use public transportation, you should have a pair of tennis shoes in your bag. In my case I always use a backpack, so I can carry as much things as I can.

E) Don't forget your products to retouch the makeup and fix your hair in case you need it. Also, bring a healthy snack with you. Having a meeting with an empty stomach is always a bad idea.

And here is also an example of a makeup that I wore for an important meeting. I love golds and nudes for it!

Hope you like it!
Kiss Kiss Bang Bang

PS: Como hoje tive e estou a ter um dia ocupado, peço, caso alguém queira que traduza para português o post, que me diga. Obrigada!


sexta-feira, 28 de março de 2014

5 Tips on How Not to Give Up

Hi Party People!

It's Friday! :D Yeah! What are you going to do tonight?

Time and time again, people ask me for advice, mostly about how can I be so positive, and also how I manage to not give up when things are going in the wrong direction. 

So I decided to do this post, because beauty is not only about makeup, but about what is inside you.

So here are my 5 Tips to make you going:

1. Organize your month, your week, your day! Sleeping late, getting lost in funny Youtube videos, going into a relaxation period that was supposed to last one day, and it lasts 5, are all things that sound so good. The problem is when reality hits you and, you discover that the time you spent "relaxing" took you away from your goals. And then that feeling of regret takes over your mind and you go deeper and deeper into a non productive phase. So take a day of your life to write down what are your goals and desires. And then establish daily objectives to work on those goals. Writing makes everything more real, and if you have a deadline to achieve something, your mind will push you to do what you need to do.

2. Learn how to take a No! One of the things that people tell me all the time is that they want to give up on a goal they have, because they can't deal with others saying No to them. This happens because No, isn't just a word, it's a negative feeling. But the truth is "No" has the meaning that you want to give it. People that are successful, manage to take a "No", as just a word. They know that the road doesn't stop there, they just have to adjust their strategy. Don't take the "No" personally, it happens everyday, and to every single one of us. Take the "No" as fuel to motivate you, to be more creative and resourceful. 

3. Rise above the negativity! Party People, let me tell you this is not an easy one, but we can do it! At my age, I analyze my life and I start to filter quicker and better who is good for me, who is going to help me be a better person, and who is going to pollute my mind with negative thoughts. It's really important to surround yourself with family and friends that support your objectives and give you the motivation you need when your feeling down. But, sometimes you can't escape listening to comments that make you feel demotivated. When this happens step away from what is causing that to you. Because if it is, you just shouldn't be around it. Then look yourself in the mirror and start remembering all that you planed and the road you walked so far. And smile! You will feel better!

4. If it was easy then everybody could do it! Your plans might be simple, or complex to achieve. But the road is going to have a few bumps. I can assure you of that! So do a Plan B, C, D,... And if all fails, sit down and rethink your strategy. You could find easier ways to achieve your goals, so be creative and get together with creative people.

5. Relax! You deserve it! Sometimes things are not going the wrong way because you have a bad plan. They are going that way because you are tired, exhausted, and need to relax a little bit. So exercise, go out with your family and friends, eat your favorite dessert and sleep. The next day, you will wake up with a different perspective about things.

So, Party People, don't give up on your dreams! Use every energy you got to be happy! 

Hope you like it!
Kiss Kiss Bang Bang


PS: Party People do meu Portugal, hoje tenho imensas coisas para fazer, por isso não posso passar o post para português. Contudo, quem achar necessário, comente que durante o fim-de-semana faço a tradução para o português.

Beijinhoooos!


terça-feira, 25 de fevereiro de 2014

The Truth about Concealers vs Dark Circles vs Wrinkles

Hi Party People!

Yesterday, when I woke up, the Sun was shining so bright! And today the same grey weather. Started seeing pics from Hawai at the beginning of the day, because my mood is need of sunshine! 

Probably you won't ear this very often, but someone has to say it... Let's talk about concealers, dark circles and wrinkles all in the eye area. Because there are some truths to say about this subject.

If you are under 25, and have a pretty good skin, with controllable dark circles and almost any wrinkles, then you can pretty much use any type of concealer in the eye area. Of course, and because it is a more sensitive area it's better to use a liquid one, then a compact one.

However, us ladies with more then 25 years old, have a different problem to resolve. Normally the dark circles with age become darker, and of course those "lovely" wrinkles around the eyes become more deep.

And with this comes the tricky part. If your concern is to cover dark circles, you will want to apply a strong liquid concealer. But what you notice is that although the dark circles get covered, the wrinkles, get more visible. 

So then you start to think: "I should use a lighter product in terms of composition." That would be your second choice. However, when you apply a lighter concealer you notice that your wrinkles seem to appear less visible, but the dark circles are still to visible. 

So what to do? Well, there is no good solution here. You will have to chose between less dark circles but more wrinkles or visible dark circles but less wrinkles!

But now you can say: "Rita, but what about all the tips and tricks for concealer in the eye area?" Well, until now I have never encounter a concealer that was efective both in dark circles and wrinkles at the same time. Powder after applying concealer will definitely increase the wrinkles (even if it is very thin or very thick powder). Applying eyeshadow primer before applying the concealer will leave an uncomfortable feeling on the skin, and for those who have more wrinkles it really doesn't work that well. And so on.

I'm a realistic, so my choice is to have that area has natural as I can. I apply a thin layer of concealer and powder just a little bit. My dark circles don't disappear, but my wrinkles also don't look huge.

So chose! Less dark circles or less wrinkles? In my experience you can't have both!

Hope you liked this post!
Kiss Kiss Bang Bang


Olá Party People!

Ontem quando acordei o Sol brilhava tanto! E hoje o mesmo tempo cinzento de sempre. Comecei a ver fotos do Hawai para começar o dia, porque estou a precisar de alguns raios de luz!

Provavelmente não vão ouvir isto muitas vezes, mas alguém tem de o dizer... Vamos falar de corretores, olheiras e rugas, tudo na area à volta dos olhos. Porque existem algumas verdades que precisam de ser ditas sobre o assunto.

Se tens menos de 25, uma pele boa, com olheiras controladas e quase sem rugas, então podes usar quase qualquer tipo de corretor que exista na area dos olhos. Claro, e porque esta pele é mais sensível é sempre melhor usar um corretor líquido do que compacto.

Contudo, nós com mais de 25 anos, temos um problema diferente para resolver. Normalmente as olheiras com a idade ficam mais escuras, e claro que aquelas rugas "maravilhosas" ficam mais profundas na pele que rodeia os olhos.

E aqui é que vem a parte complicada. Se a tua preocupação é cobrir as olheiras, vais querer aplicar um corretor mais intenso. Mas o que notas é que apesar das olheiras ficarem cobertas. as rugas ficam mais visíveis.

Então começas a pensar: "Não seria má ideia usar um corretor mais leve". Isso seria a tua segunda opção. Todavia, quando aplicas um corretor mais leve, notas que as rugas parecem menos visíveis mas que as olheiras não ficam tão disfarçadas.

Então o que fazer? Bem, não existe aqui uma solução perfeita. Tens de escolher entre menos olheiras mas mais rugas e mais olheiras e menos rugas!

Mas agora podes dizer: "Rita, e todos os truques para corretores na area dos olhos?" Bem, até agora não encontrei um corretor que fosse eficaz para combater as rugas e olheiras ao mesmo tempo. Pó aplicado por cima do corretor vai definitivamente aumentar as rugas (mesmo que seja um pó mais compacto ou solto). Aplicar primer de sombras antes do corretor, vai deixar desconforto na pele, e para aqueles com mais rugas não vai funcionar muito bem. E por aí fora.

Sou realista, por isso a minha escolha é parecer o mais natural possível. Aplica uma camada fina de corretor e um pouco de pó. As minhas olheiras não desaparecem, mas as minhas rugas também não aparentam ser enormes.

Por isso escolhe! Menos olheiras ou menos rugas? Pela minha experiência não podes ter os dois!

Espero que tenham gostado deste post!
Kiss Kiss Bang Bang


My concealer at the moment:


ColorStay by Revlon


sexta-feira, 24 de janeiro de 2014

Eyebrows: Blonde, Brunette and Redhead!

Hi Party People!

And it´s Friday! :D What are you going to do?! I'll be working until I go to bed... LOL! Not a very exciting Friday for most, but exciting for me!

Today we are going to talk about eyebrows. Specially the correct color of eyebrow shade for the color of your hair.

But before we go to the specifics, there are some general things you should know.

The color of your eyebrow needs to be one shade to two shades lighter then your hair color, so your eye area doesn't look too aggressive. 

Avoid black color if you have black hair. It will look to intense, specially to the ladies that have more then 25 years old. The best option is a deep dark brown color. 

Most eyebrow products have an ash undertone, because most of us has an ash color on our eyebrows. So be careful when you choose an eyeshadow to substitute your eyebrow product. Make sure that it has an ash undertone.

So let's go to the specifics!

Hope you like it!
Kiss Kiss Bang Bang


Olá Party People!

E é Sexta-Feira! :D O que vão fazer hoje?! Vou estar a trabalhar até ir para a cama... LOL! Não será uma Sexta muito excitante para a maioria mas é excitante para mim!

Hoje vamos falar sobre sobrancelhas. Especialmente a cor correta de sombra de sobrancelhas para a cor do vosso cabelo.

Mas antes de irmos aos pormenores, existem algumas dicas gerais que devem saber.

A cor da vossa sobrancelha precisa de ser um a dois tons mais clara do que a vossa cor de cabelo, para que a area dos vossos olhos não pareça demasiado agressiva.

Evitem a cor preta se têm cabelo preto. Vai parecer demasiado intenso, especialmente para as meninas que têm mais de 25 anos. A melhor opção é um castanho bem escuro.

A maioria dos produtos de sobrancelhas têm um undertone acinzentado, porque a maioria de nós tem esse tom nas nossas sobrancelhas. Por isso cuidado quando decidem escolher uma sombra de olhos para substituir o vosso produto de sobrancelhas. Tenham a certeza que tem esse undertone acinzentado.

Vamos agora aos pormenores!

Espero que gostem!
Kiss Kiss Bang Bang


Blondes


My gorgeous and sexy blonde ladies out there, the color of your eyebrows should be a light brown color. But if you have a cool blonde hair color, go for a brown with a lot of that ash vibe. If you have a warm blonde hair color, go for a light brown but with a bit of red. Just a little bit!

Loiras lindas e sexys deste mundo, a cor da vossa sobrancelha deve ser preenchida com um castanho claro. Mas se têm um loiro mais frio, usem um castanho com um undertone acinzentado. Se tiverem um loiro mais quente, usem um castanho claro com um pouco de vermelho. Mas só um pouquinho!


Redheads


Hot, intense Redheads out there, you should use a brown shade. But it has to have a strong red undertone, to match your red hair.

Ruivas intensas e "hot" (lol), devem usar um tom castanho. Mas tem de ter um undertone vermelho, para combinar com o vosso cabelo. 


Brunettes


Beautiful, Classic Brunettes out there, choose a brown color that has ash undertone in it.

Morenas, Lindas e Clássicas por aí, escolham uma cor castanha que tenha um undertone acinzentado.


PS: Here you can see the big difference between doing your eyebrows and not doing it. A big difference, isn't it?!

PS: Aqui conseguem ver a grande diferença entre fazer e não fazer as sobrancelhas. È uma grande diferença, não acham?! 


quinta-feira, 23 de janeiro de 2014

Contour/ Highlight: Products you should have!

Hi Party People,

Today I'm going to show you two products that you can use to contour/ highlight your face.

For those who are not aware of what I'm talking about, the contour part of the product, applied in certain areas will create the illusion that that area is smaller. 

The highlight part of the product, will enhance areas that you want people to notice when you do your makeup. For ex: cheek bones, the bridge of your nose, the cupids bow on your lips,...

This kind of technique could make or break your makeup. So use these products wisely. 

Hope you like it!
Kiss Kiss Bang Bang


Olá Party People,

Hoje, vou mostrar dois produtos que podem usar para contornar/iluminar a vossa face.

Para aqueles que não sabem do que estou a falar, a parte de contorno do produto, aplicada em certas areas vai criar uma ilusão de que essa mesma area é menor.

A parte de iluminação do produto, vai realçar areas que queremos que outros notem quando fazemos a maquilhagem. Por ex: maças do rosto, cana do nariz, o arco de cupido nos lábios,...

Este tipo de técnica pode ser maravilhosa ou horrível para a vossa maquilhagem. Por isso usem estes produtos conscientemente. 

Espero que gostem!
Kiss Kiss Bang Bang


 Face Form by Sleek Makeup

For those that have oily skin, use powder to contour/ highlight. It will last longer in your skin, and it will help you set your makeup. Use the brown part to contour and the middle part to highlight.

Para os que têm pele oleosa, usem pó para contornar/ iluminar. Vai durar mais tempo na vossa pele, e vai ajudar a selar a maquilhagem. Usem a parte castanha para o contorno e a parte do meio do produto para iluminar. 


Chiaroscuro by EM Cosmetics 

For those with dry skin, the best option is cream products like this one by EM Cosmetics. It will make your skin look more healthy and natural. It will also be more comfortable for it.

Para aqueles com pele seca, a melhor opção são produtos em creme como este da EM Cosmetics. Vai fazer com que a pele fique com um aspecto mais saudável e natural. Também vai ser mais confortável de usar.


Here is a pic I did a while back ago that shows how to contour/ highlight. Hope it's helpful!

Aqui está uma pic que fiz à uns tempos atrás que mostra contorno/ iluminação. Espero que seja útil!


quarta-feira, 22 de janeiro de 2014

Elegant Cocktail Dresses by DressV on Valentine's Day

Hi Party People!

You might have noticed that this month and the next I will talk about Valentine's Day a lot! So if you are a romantic like me keep an eye on the blog to see new posts.

Today let's talk about elegant cocktail dresses (by DressV). And why?! Because we all want to look glamorous and sexy for our special Valentine's Day dinner. Or if you are single, maybe to leave the house with your friends and find true love :) Who knows?!

However finding an elegant cocktail dress sometimes can be very exhausting. Some are to classic, some are to sexy, some are to short, ... So I'm going to give you a few tips, so you can find your perfect elegant cocktail dress for special occasions.

Hope you like it!
Kiss Kiss Bang Bang


Olá Party People!

Devem ter reparado que neste mês e no próximo vou falar muito sobre o Dia de São Valentim! Por isso se são românticos como eu, continuem a espreitar o blog para verem novos posts.

Hoje vamos falar sobre vestidos de cocktail elegantes (por DressV). E porquê?! Porque todos queremos estar glamorosos e sexys para o nosso jantar de Dia dos Namorados. Ou se são solteiros, talvez para sair de casa com os vossos amigos e encontrar amor verdadeiro :) Quem sabe?!

Contudo, encontrar um elegante vestido de cocktail, pode ser por vezes desgastante. Alguns são demasiado clássicos, outros demasiados sexys, outros demasiados curtos,... Por isso vou-vos dar algumas dicas, para que possam encontrar o perfeito e elegante vestido de cocktail para cada ocasião especial.

Espero que gostem!
Kiss Kiss Bang Bang


Valentine's Day Dinner with your soul mate... Go sexy and short! This is a day where we can get out of the routine and just impress our soul mate. They will appreciate the fact that you did and effort to be different making their night even more special.

Jantar de São Valentim com a vossa alma gémea... Usem curto e sexy! Este é um dia em que podemos sair da rotina e impressionar a nossa alma gémea. Eles vão apreciar o facto que terem feito um esforço para serem diferentes, fazendo esta noite ainda mais especial.    


Elegant Zipper-up Mini Sheath/Column Beading One-Shoulder Cocktail Dress by DressV


Valentine's Day Dinner is your first date... Go glamorous and flattering! Here you want to dress to impress, so going for an A line shape is the best way to go, because it makes most body types look amazing. Also black, turns every piece of clothing look a lot more glamorous. Don't you think?

Jantar de São Valentim como primeiro encontro... Usem algo glamoroso e lisonjeador! Aqui querem vestir para impressionar, por isso ir pelo formato A line é a melhor opção, porque faz com que a maioria dos corpos pareça fantástico. O preto também faz com que qualquer peça de roupa pareça mais glamorosa. Não acham?


Sparkling Strapless Beading Short/Mini Length A-line Cocktail/Evening Dress by DressV


Valentine's day with the girls... Go... Well, however you want! This is a kind of situation, that you should celebrate who you are. So chose the dress that you like most. You will have an amazing time.

Dia de São Valentim com as amigas... Usa... Bem, o que quiseres! Este é o tipo de situação, em que deves celebrar quem és. Por isso escolhe o vestido que gostes mais. Vais divertir-te!


Attractive Asymmetric Length One Shoulder Beading Cocktail Dress


All these dresses are from the on-line store DressV. So take a look
at: http://www.dressv.com/cocktail-dresses-2014-c103450/


quarta-feira, 2 de outubro de 2013

Fuller Bigger Lips with The Body Shop

Hi Party People!

Hope you are doing well!

Today let's talk about about lips! Who doesn't want bigger and fuller lips?! I do!

And with some products we can really make a big difference.

So let's see the steps to built those beautiful lips.

Hope you like it! =)

xo


Olá Party People!

Espero que estejam bem!

Hoje vamos falar de lábios! Quem não quer lábios maiores e volumosos?! Eu quero!

E com alguns produtos podemos mesmo fazer a diferença.

Por isso vamos ver os passos para construir esses lábios lindos.

Espero que gostem! =)

Beijinhooos


Lips without any type of product.
Lábios sem qualquer tipo de produto.


Lips with moisturizer.
Lábios com o hidratante.


Lips with the Glow Enhancer in the center and edges of the lips.
Lábios com o Glow Enhancer no centro e contorno dos lábios.


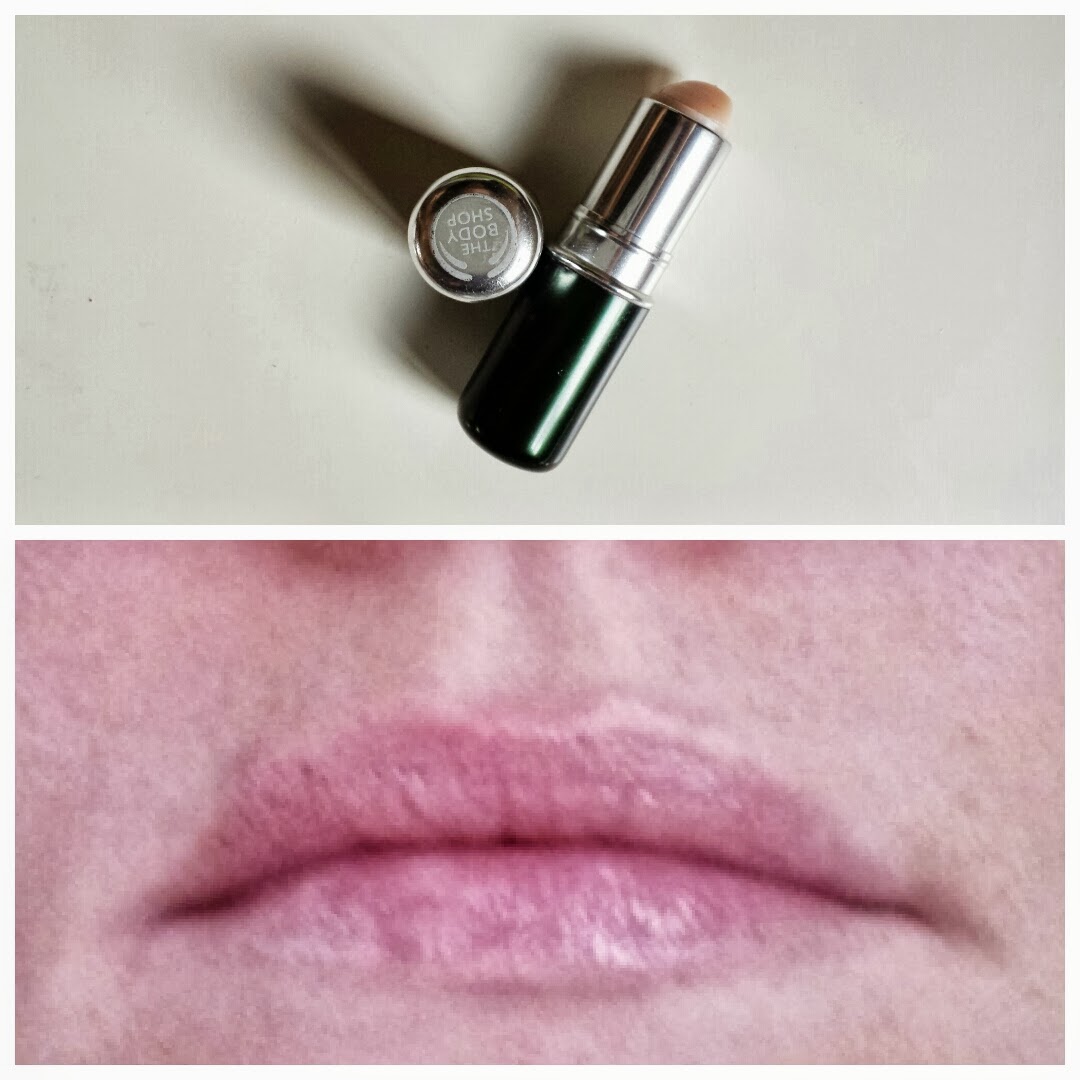
Lips with lipstick.
Lábios com o baton.


Lips with clear lip gloss on the center of the lips.
Lábios com o gloss transparente no centro dos lábios.

All products are from The Body Shop.


sexta-feira, 23 de agosto de 2013

How to: From Red to Blonde(ish) !

Hi Party People,

Hope you are doing great!

I've been thinking about going blonde again. But I didn't want to spend the money to go to an hairdresser (btw, and I'm speaking against what I did, you should always go to an hairdresser to change your hair colour).

So Yesterday I bought the Créme Pre- Lightener Nutrisse Truly Blonde and the Permanent Nourishing Hair Colour Radiant Blondes in 9.03 Natural Light Baby Blonde by Garnier. They were both 11 pounds, more or less.

So first I used the Créme Pre- Lightener. I did the mixture has it was described in the box and first reed the instructions. It's very important to do that.
I applied the mixture to the longer part of my hair, and let it set for 30min.

Then I applied the mixture to the roots of my hair and massaged all the product. I waited another 30 min.

Then I washed it and applied the conditioner.

Even with the conditioner my hair was dry but manageable. The color was ginger in the longer part of my hair and in the roots it lighten my very dark colour hair a bit.

The next day, I applied the Hair Colour. I would advise you not to do that just because, the hair is very weak after the Pre- Lightener, but I did it knowing the risks.

I followed the instructions and the result was a ginger hair colour with less reds then the day before. I have to say that I was surprised with this fast result. Because my hair is very dark, almost black. So it lightened more then I thought.

It covered almost 100% of my hair.

I love it!

And you?! Would you go from dark to blonde?!

Hope you like it!
xo

PS: I will do next week a post about the way Rute Vigário of Hair Identity colored my hair red! =)


Olá Party People,

Espero que estejam bem!  

Tinha pensado em voltar a ser loira de novo. Mas não queria gastar o dinheiro para ir a uma cabeleireira (contudo, e contra mim falo, devem sempre ir a uma cabeleireira para mudar a vossa cor da cabelo).

Por isso ontem, comprei o Créme  Pre- Lightener Nutrisse Truly Blonde e o Permanent Nourishing Hair Colour Radiant Blondes em 9.03 Natural Light Baby Blonde da Garnier. Foram mais ou menos 11 libras.

Primeiro usei o Créme Pre- Lightener. Fiz a mistura como estava descrito na caixa e li as instruções. É muito importante fazer isso. 
Apliquei a mistura à parte mais longa do meu cabelo, e deixei estar durante 30min.

Depois apliquei a mesma mistura ás raizes do cabelo e massajei. Esperei outros 30min.

Por fim retirei o produto com água e apliquei o condicionador.

Mesmo com o condicionador o meu cabelo ficou seco mas manejável. A cor que ficou foi ruiva nas partes mais longas do cabelo e e nas raízes clareou um pouco a minha cor tão escura.

No dia a seguir, apliquei a Hair Colour. Aconselho-vos a não fazerem isto, o cabelo depois do Pre-Lightener fica muito fraco, mas continuei por minha conta e risco.

Segui as instruções e o resultado foi ruivo mas com menos vermelhos que o dia anterior. Devo dizer que fiquei surpreendida com o resultado tão rápido. Pois o meu cabelo é muito escuro, quase preto. Por isso clareou mais do que estava à espera.

Quase que cobriu 100% do meu cabelo.

Adoro!

E vocês?! Iriam de cabelo escuro para loiro?1

Espero que gostem!
Beijinhoooos

PS: Para a próxima semana faço um post sobre a maneira como a Rute Vigário do Hair Identity me aplicou a cor ruiva/vermelha.


Before all the process starts...


During the application...


Result after the Pre- Lightener...


After the Pre- Lightener I applied this colour...


Final Result...


quarta-feira, 3 de julho de 2013

How to apply Nail Wraps with Elegant Touch

Hi Party People!

Today I'm going to talk about Nail Wraps! When I found this concept of taking care of my nails, I just said: Amen! It's easy, fast, and with beautiful designs.

The brand that I've been using is Elegant Touch. I just love their ideas. And again it's a super easy application!

The Nail Wraps I will be applying today are exclusive of the USA and they are called Caviar. They are very sparkly and full of glamour.

Here is the application:


Olá Party People

Hoje vou falar sobre Nail Wraps! Quando encontrei este conceito de cuidar das unhas , apenas disse: Amen! E fácil, rápido e com designs lindos.

A marca que tenho usado é a Elegant Touch. Adoro as ideias da marca. E como já disse é super fácil aplicar!

Aqui esta a aplicação:


My hand with some of the nail wraps.
A minha mão com alguns dos nail wraps.


The materials.
Os materiais.


Remove one wrap that is close to the size of your nail and put it on top of your nail with the round part down. You don't need glue.
Retira um wrap que seja do tamanho mais próximo da tua unha e coloca-o no topo da unha com a parte redonda para baixo. Nao precisas de cola.


  Join the excess part all together and smooth the surfice of  the nail.
Junta o excesso do wrap todo e alisa a superficie da unha.


File the excess wrap.
Lima o excesso do wrap.


Final Result!
Resultado Final!


Hope you like it!
xo

Espero  que gostem!
Beijinhos